If you've already received your Juniper device and are lucky enough to have an MX router, here are the first steps you should take when setting up or configuring your device.
For the initial configuration of Junos devices, you'll need to have certain information on hand before you get started, since the device will ask you for this information to set up the basic configuration. The information you need to know is:
- Name that the computer will use on the network (hostname)
- Domain Name
- IP addresses and subnet masks for interface configuration
- Gateway
- DNS IP Address
- Router password
1. Connecting to the console.
To connect to the device for the first time, it is best to do so via the console. To do this, you can use the cable and adapter provided by Juniper. If you already have a console cable, it is also compatible with this type of connection.
2. Logging in to the Juniper MX router for the first time
Once you are connected via the console, you will see the device booting up (if it has already booted up, press the Enter key several times). When the router has finished booting up, you will see a prompt on the console that says "login:".
- Log in as the root user without a password. Now you can see that the prompt has changed to root@%.
- Access the CLI interface by typing "cli" at the prompt, and something like "root@>" should appear.
- Enter setup mode using "configure"
- root@> configure
- And the following appears
- cli> configure
- [edit]
- root@#
3. Understanding the Junos OS Infrastructure and Its Processes
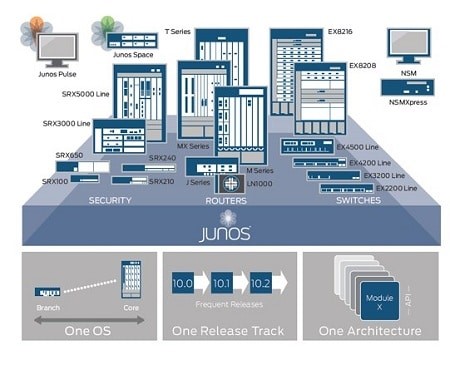
Junos OS includes processes for managing IP routing, interfaces, networks, and the switch. Junos OS runs on the Routing Engine (RE). The RE kernel coordinates communication among Junos OS processes and provides the connection to the packet forwarding engine
Using the CLI, you can configure switching features and set interface properties. After applying a configuration change, you can use Junos Space or the CLI to monitor, manage, and diagnose protocols or network issues.
A switch has two main software components:
- Packet Forwarding Engine: It is responsible for processing packets, applying filters, routing policies, etc.
- Routing Engine – 3 Main Functions
- Create a packet-forwarding switch that provides route monitoring, filtering, and switching of incoming data packets, and directs outgoing packets to the correct interface.
- It maintains the routing table used by the switch and controls the routing protocols running on the device
- It provides control and monitoring of the device's functions, including power and device status monitoring
The Packet Forwarding Engine and the RE consist of multiple processes, each responsible for specific functions. This division makes JUNOS a stable system, since each process runs in its own protected memory space, and a malfunction in one process does not necessarily affect the others. This adds stability to the entire system. To learn about the main JUNOS processes, we recommend reviewing the official Juniper documentation.
4. Set a root password and secure the Juniper MX router
By default, devices running Junos for the first time do not have a password set for the root user. Therefore, one of the first tasks you need to perform is to set this password to secure your network.
There are three methods
for doing this
- Password in plain text that Junos encrypts
[edit global system groups]
root@# set root-authentication plain-text-password
New Password: Enter your password here
Re-enter new password: Re-enter password here
- Encrypted password
[edit global system groups]
root@# set root-authentication encrypted-password password
- SSH Public Key
[edit global system groups]
root@# set root-authentication (ssh-dsa | ssh-ecdsa | ssh-rsa key)
Optionally, you can secure the network by allowing root access only via the console. To do this, configure the following:
set services ssh root-login deny
set apply-groups global
And we apply the settings:
commit
5. Hostname Configuration
To give our network device a name, we'll set up a hostname
root@# set host-name mercadoit-router0
We apply the settings
[edit]
root@# commit
And now the name we just set up appears
mercadoit-router0#
6. DNS Configuration
DNS allows us to resolve names to IP addresses; thus, by using a FQDN, we can access the IP address of the device we are looking for. Here's how to configure DNS in Junos:
user@host# set name-server 192.168.1.253
user@host# set name-server 192.168.1.254
7. IP Configuration
The next step is to configure the IP addresses we need. For example
root# set interfaces ge-0/0/0 unit 0 family inet address 192.168.1.1/24
root# set interfaces ge-0/0/1 unit 0 family inet address 192.168.2.1/24
root# set interfaces ge-0/0/2 unit 0 family inet address 192.168.3.1/24
root# set interfaces ge-0/0/3 unit 0 family inet address 192.168.4.1/24
8. Disable ICMP message forwarding
It is good practice to disable ICMP message forwarding for security reasons. This prevents us from sending useful information to potential attackers who could exploit these types of messages. Forwarding can be disabled either globally on the device or on a specific interface.
Globally
[edit system]
user@switch# set no-redirects
And at the interface level
[edit interfaces interface-name unit logical-unit-number family family]
user@switch# set no-redirects
9. View active alarms
Junos allows you to view the alarms that are currently active on the device. To view these alarms, simply run the following command
user@host> show system alarms
- We recommend reviewing the official Junos documentation to see the different levels
10. System Monitoring
To view various types of useful information, we can run a series of commands. The main ones are:
user@switch>show system uptime
user@switch>show system users
user@switch>show system storage
user@switch>show system processes
user@switch>show interfaces terse
If you still have questions about configuring a Juniper MX Series router, leave your question in the comments or contact us, and we'll help you.